> For the complete documentation index, see [llms.txt](https://docs.microside.com/llms.txt). Markdown versions of documentation pages are available by appending `.md` to page URLs; this page is available as [Markdown](https://docs.microside.com/practicas/mikroc-pro-for-pic/pic18f4550-or-pic18f45k50/9-teclado-matricial.md).
# 9 - Teclado Matricial
> **mikroC PRO for PIC**
>
> [**PIC18F4550 / PIC18F45K50**](https://docs.microside.com/practicas/mikroc-pro-for-pic/pic18f4550-or-pic18f45k50)
## **Introducción**
En esta práctica se implementa el encendido y apagado de un LED, haciendo uso de un teclado matricial 4×4. Para encender el LED se presiona la tecla 1 y para apagarlo se presiona la tecla 0.
## **Descripción**
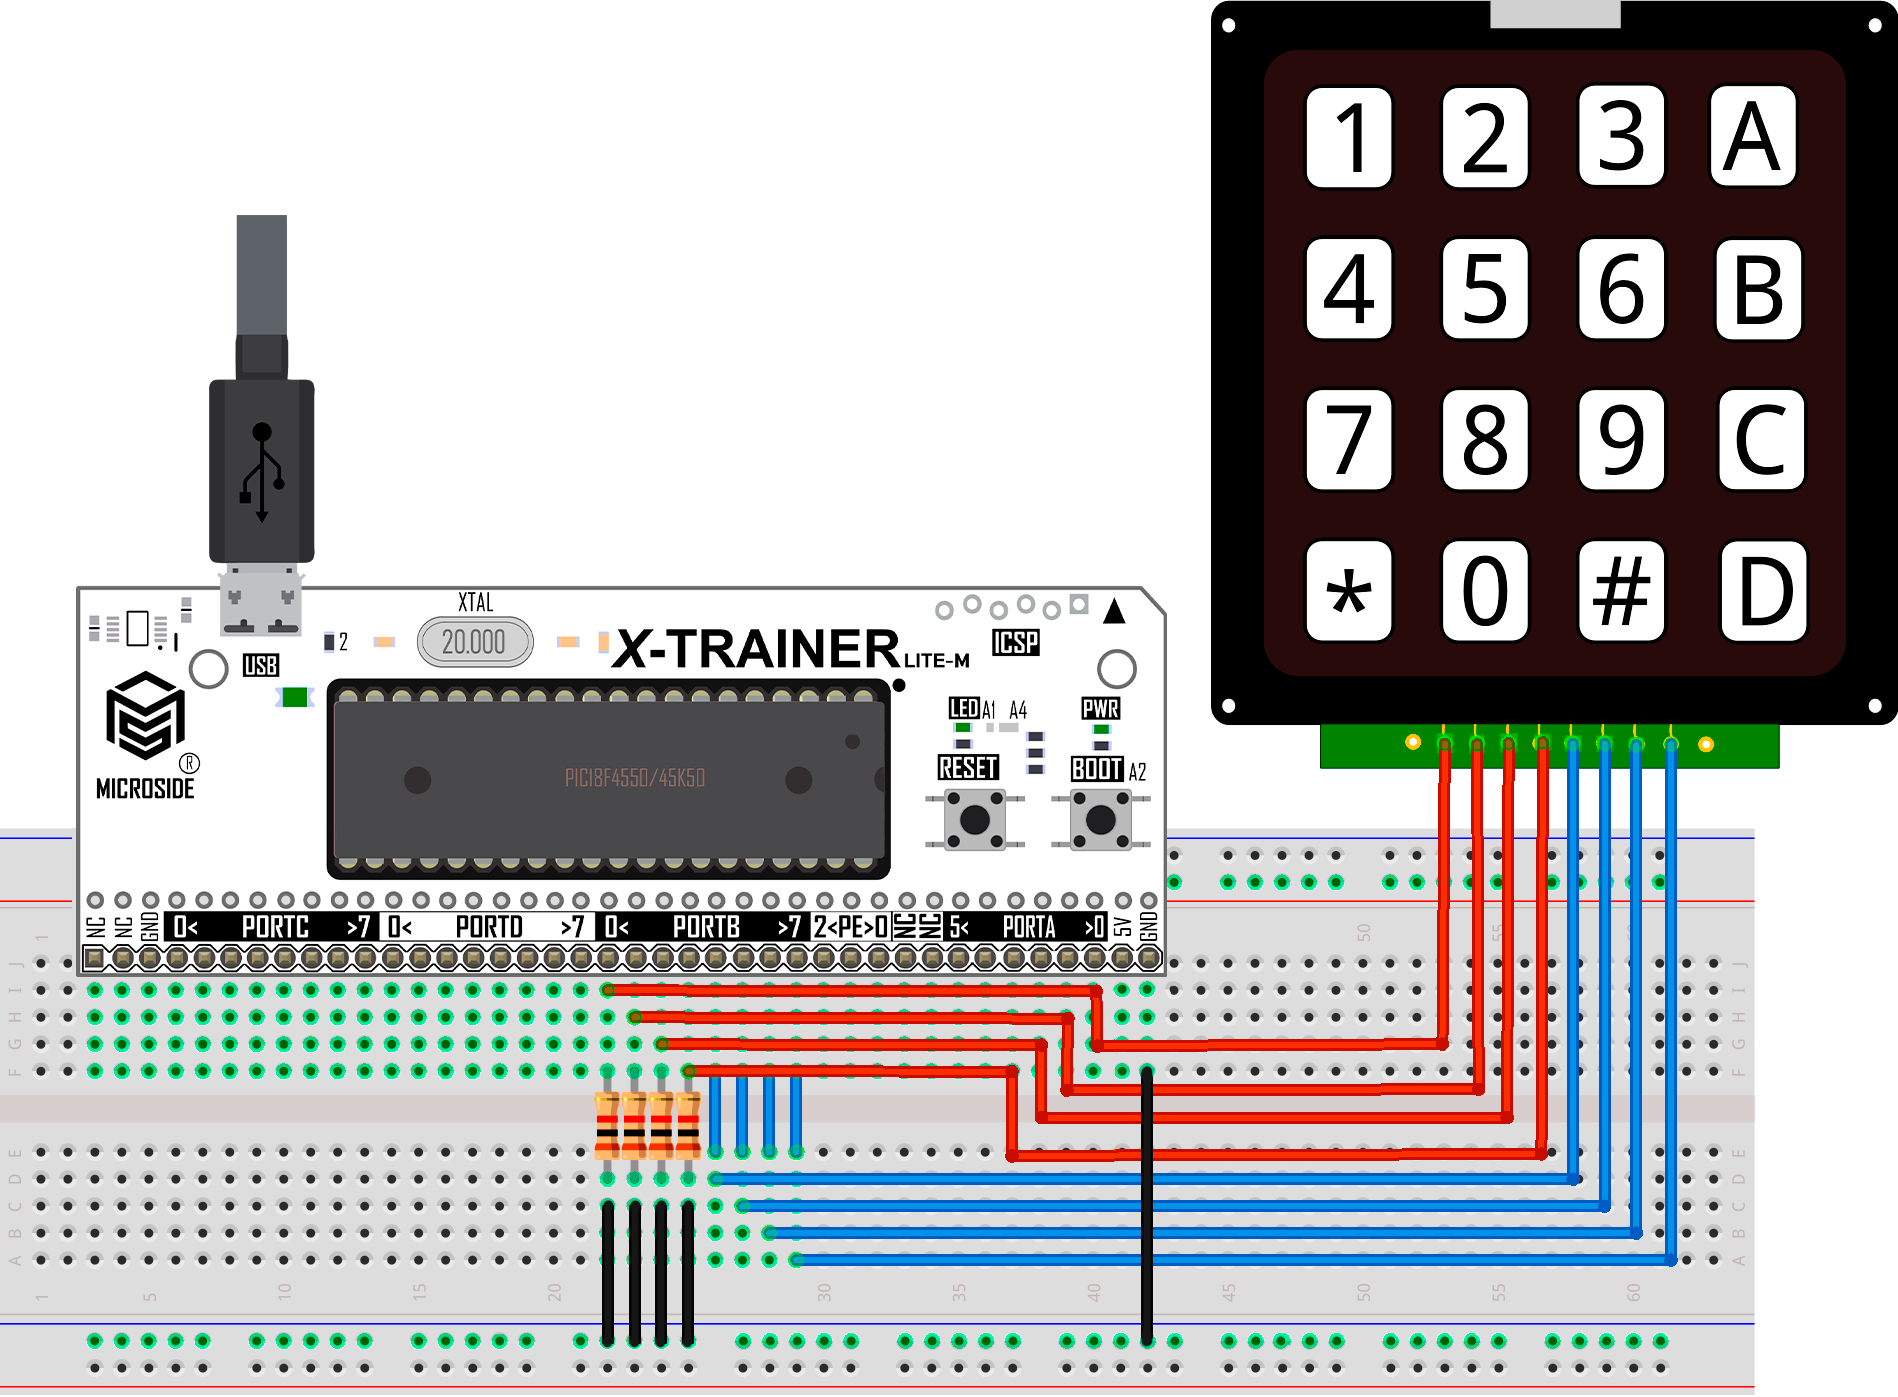
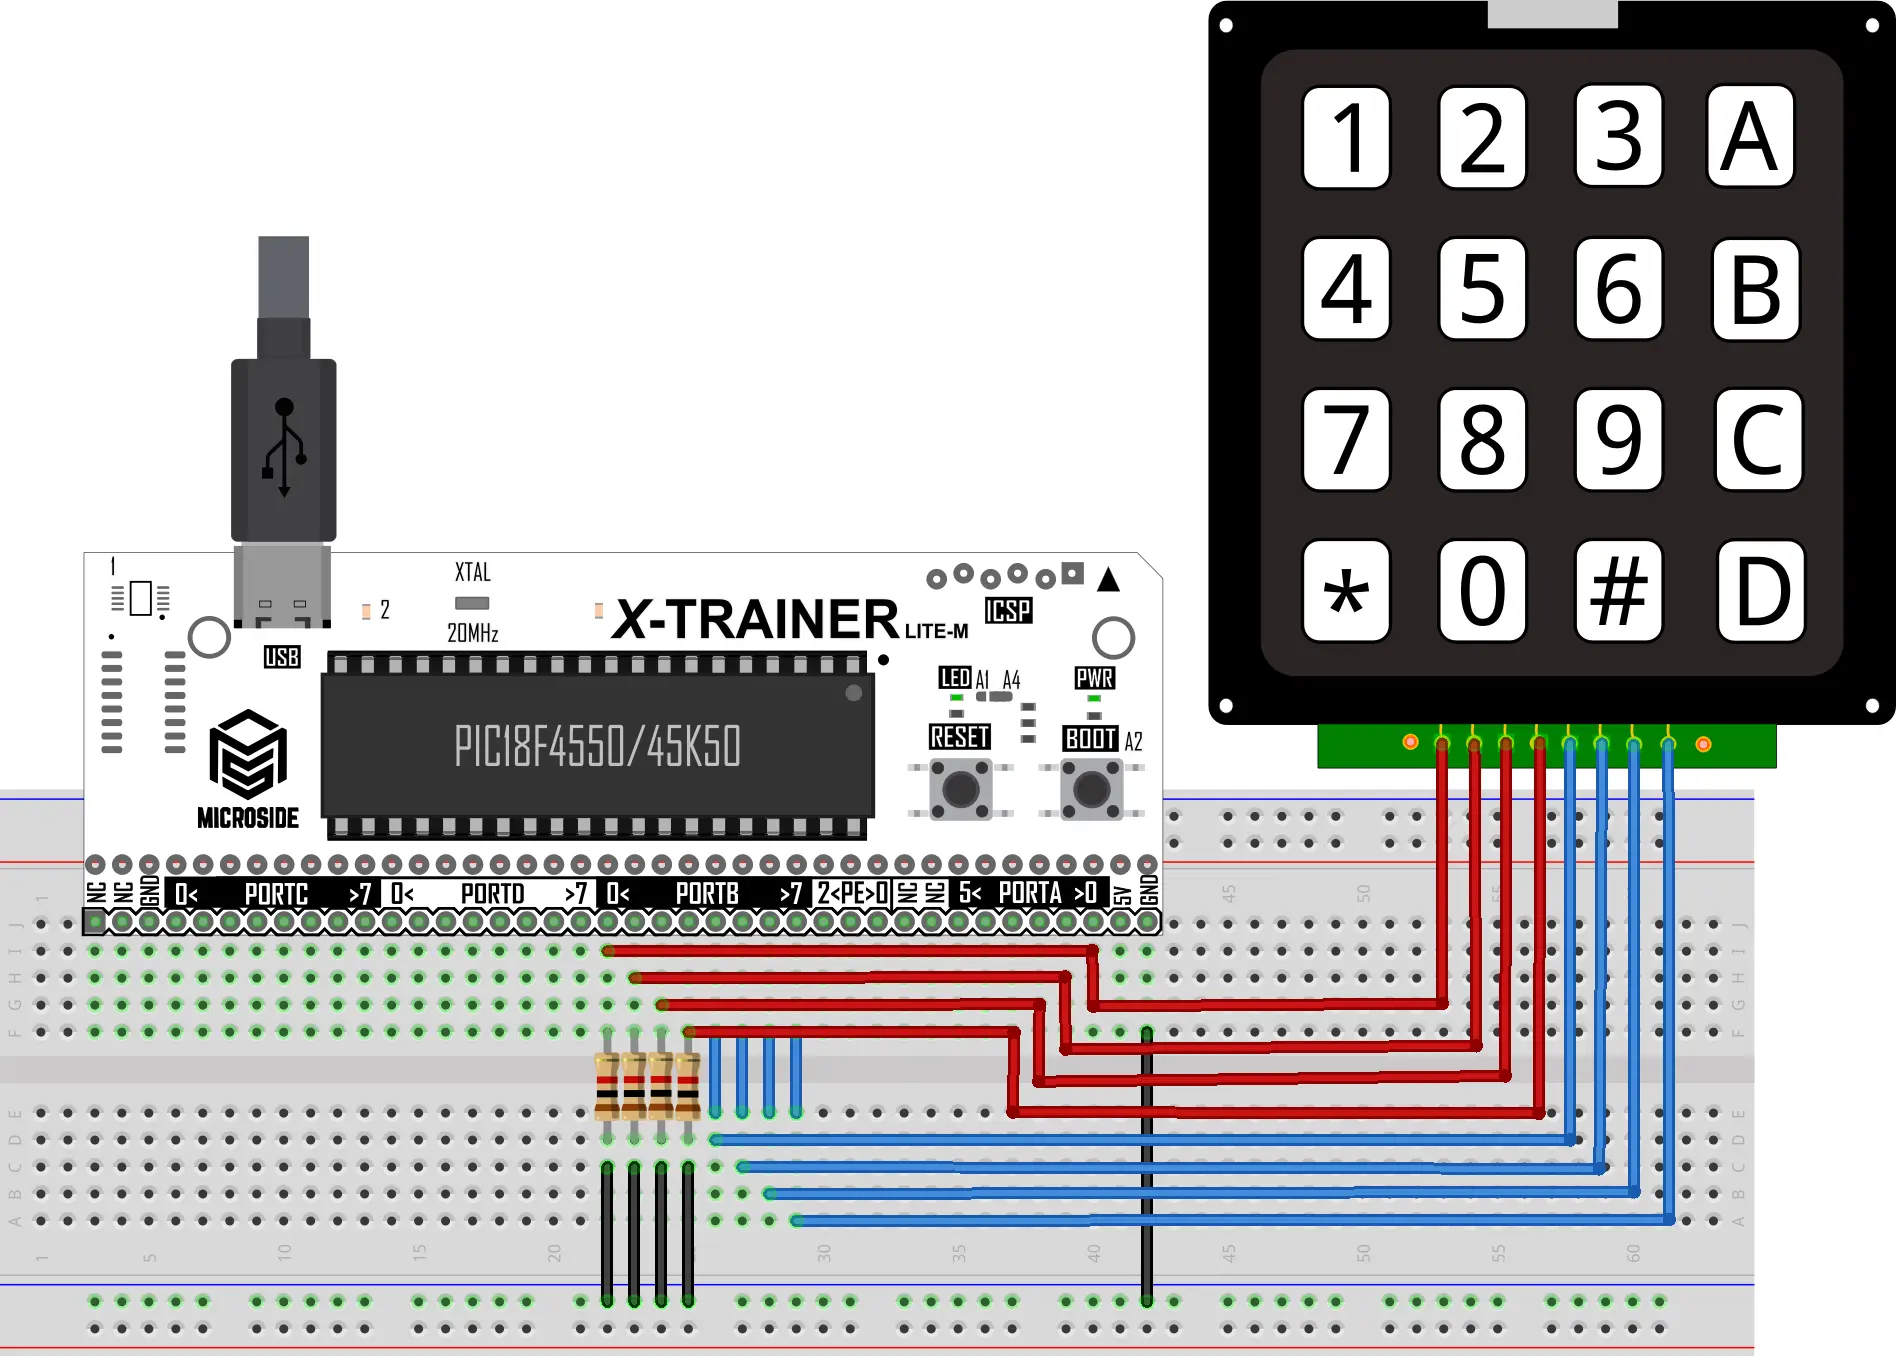
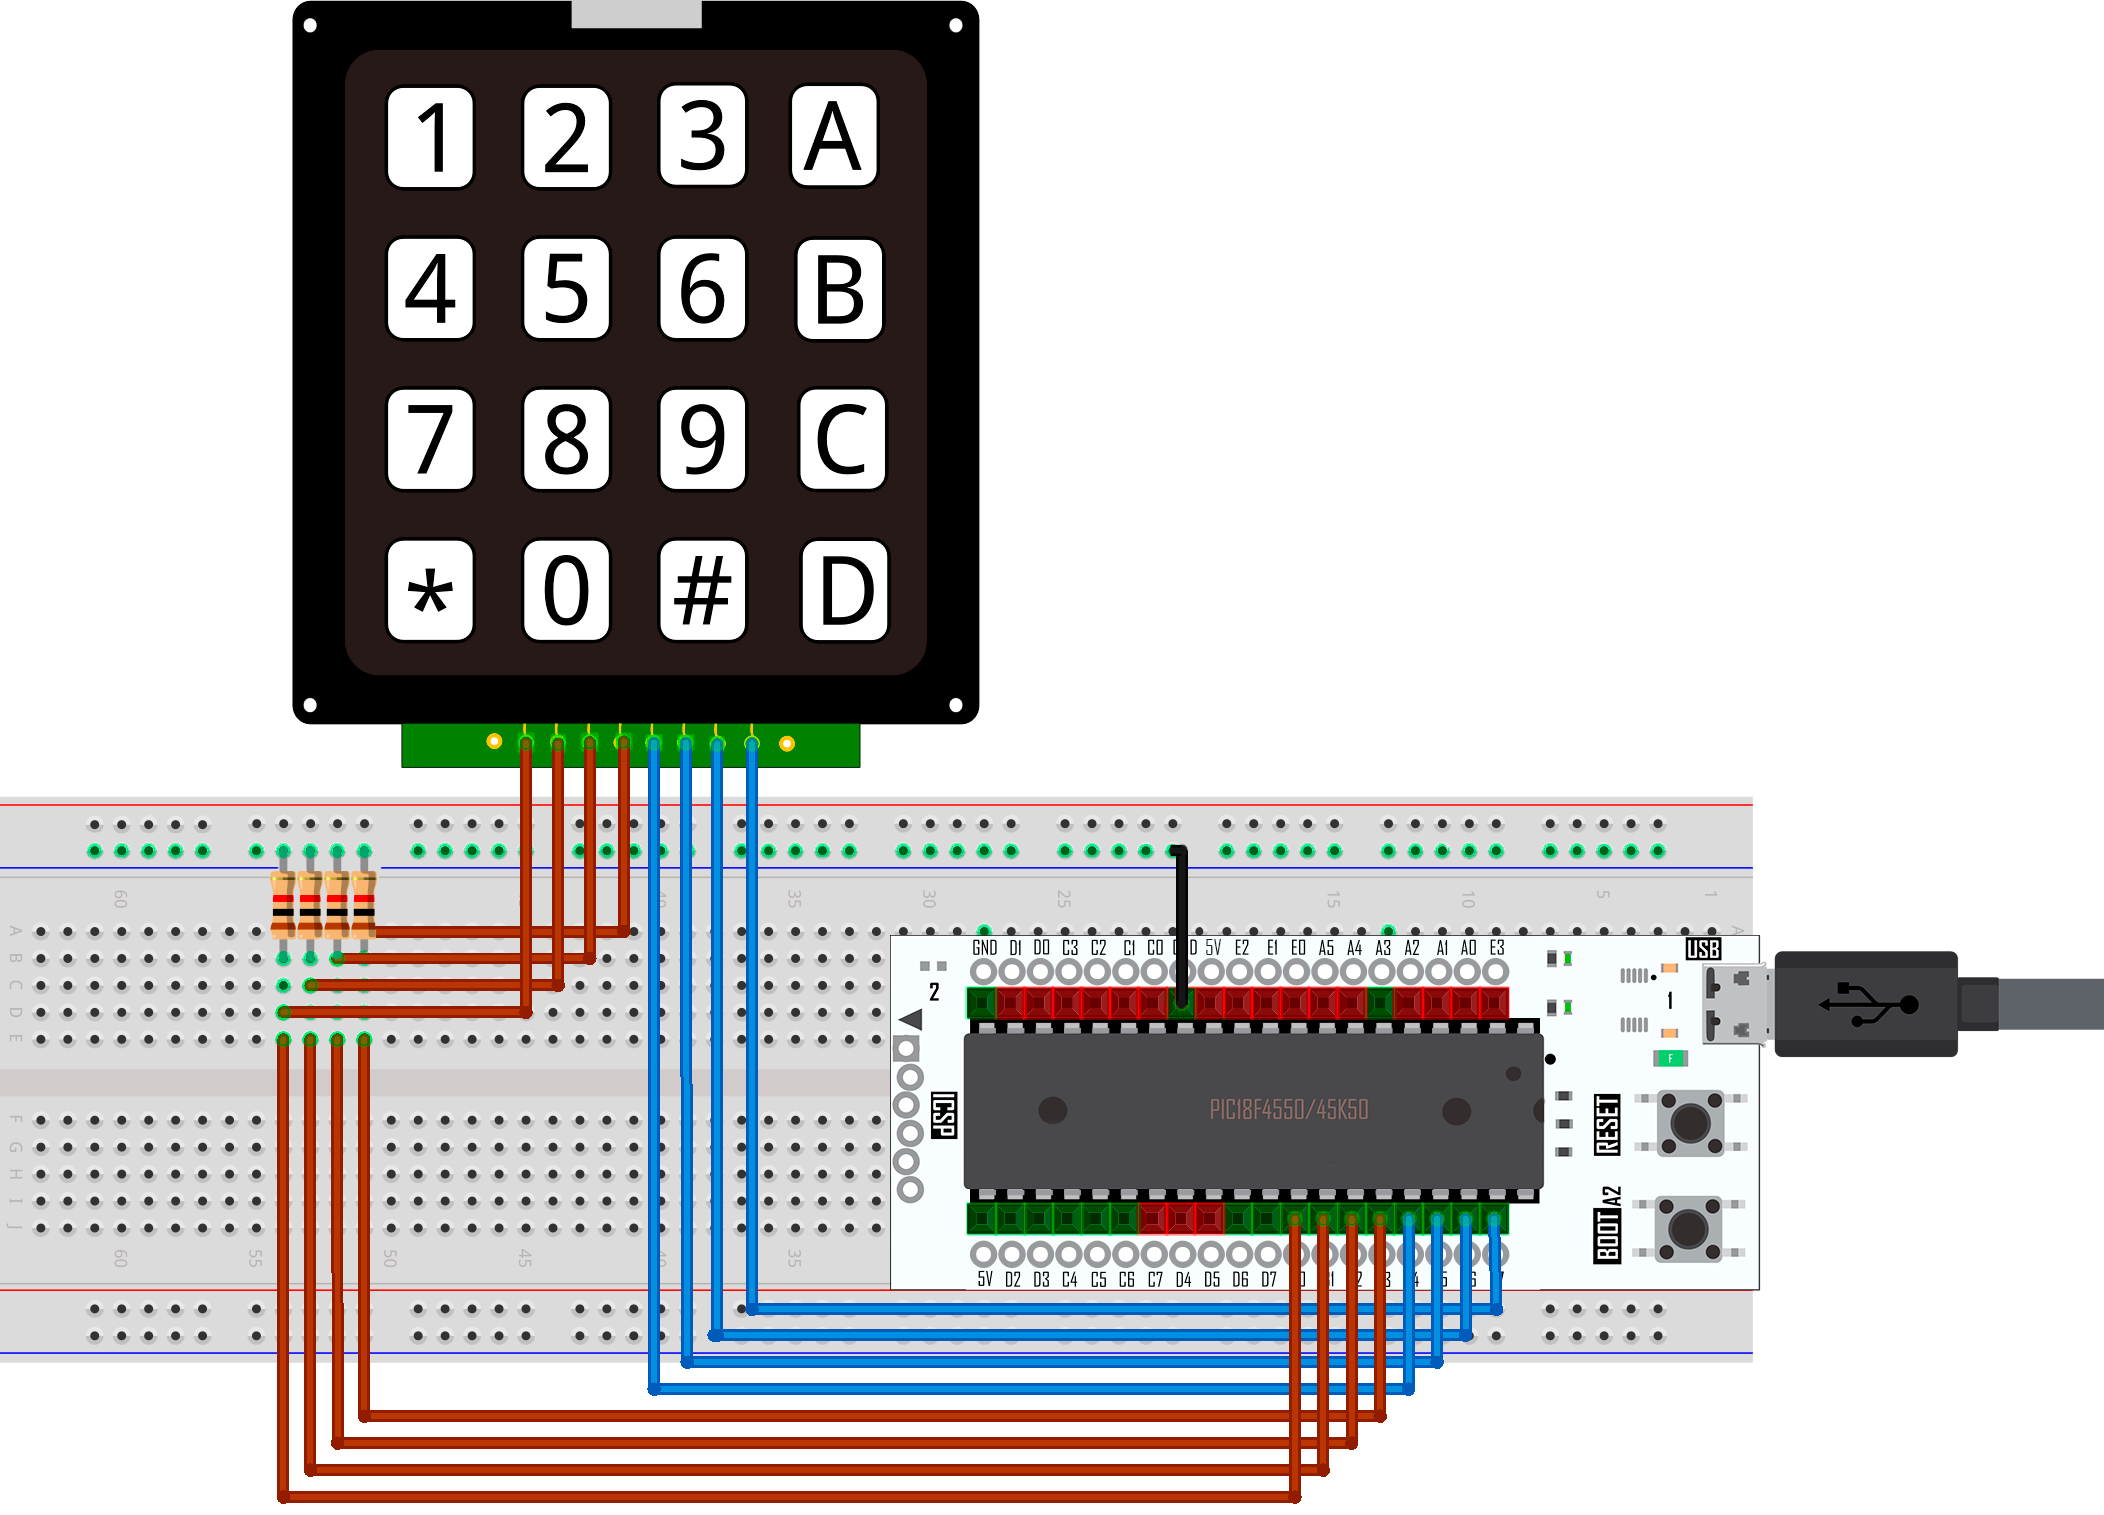
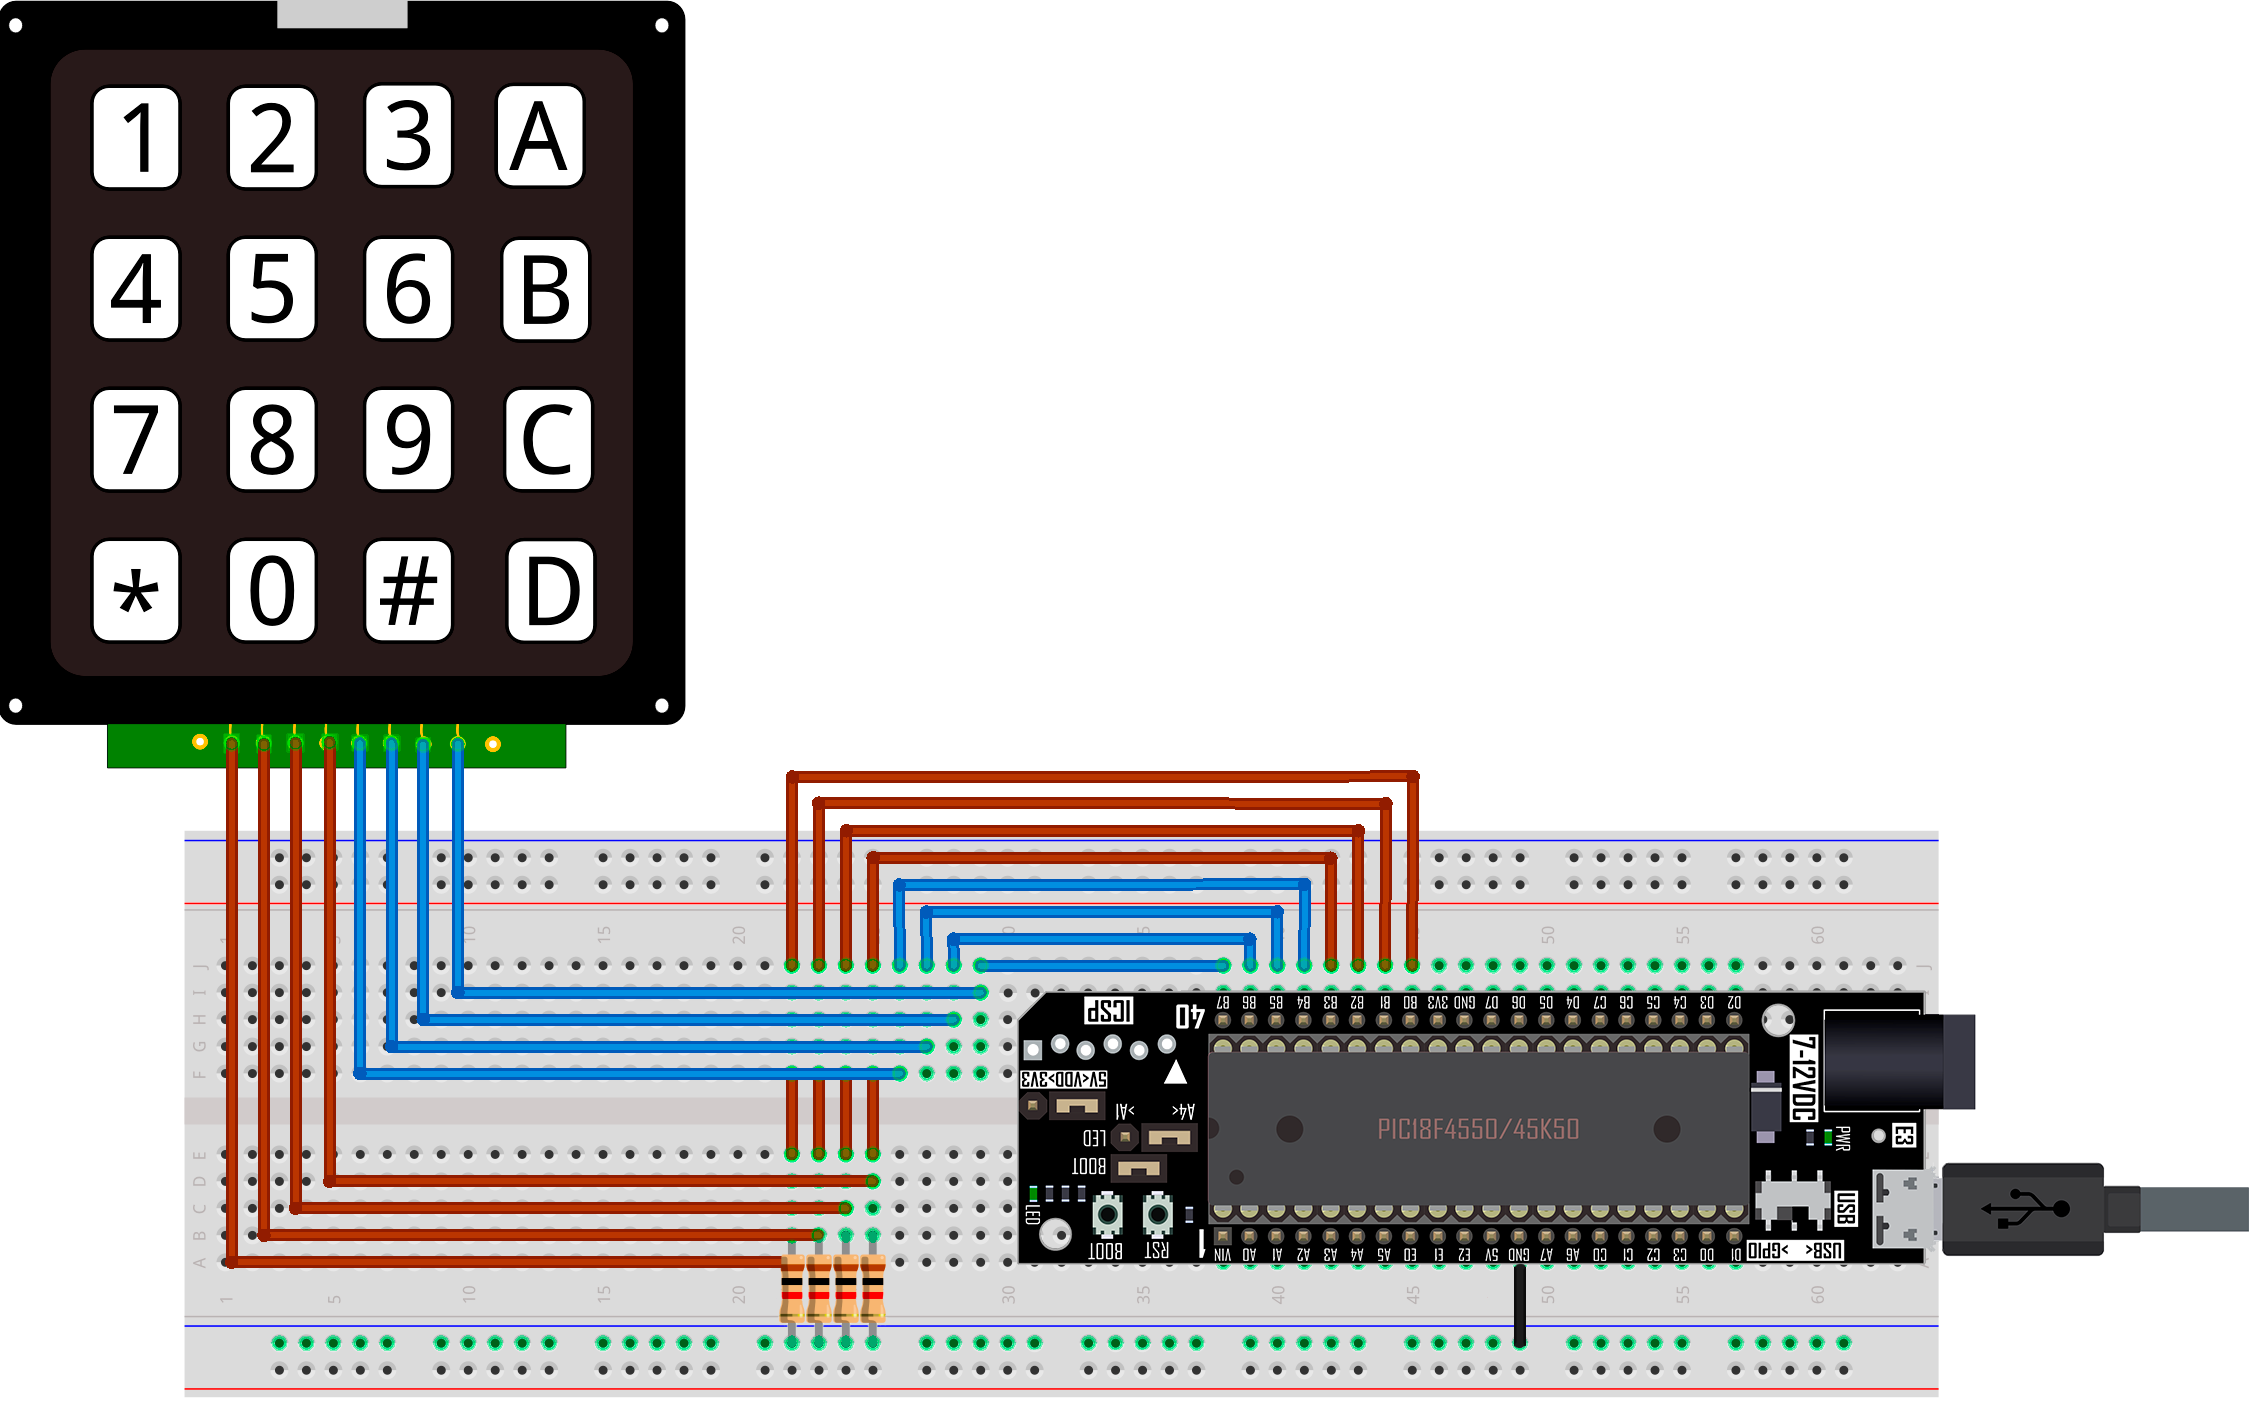
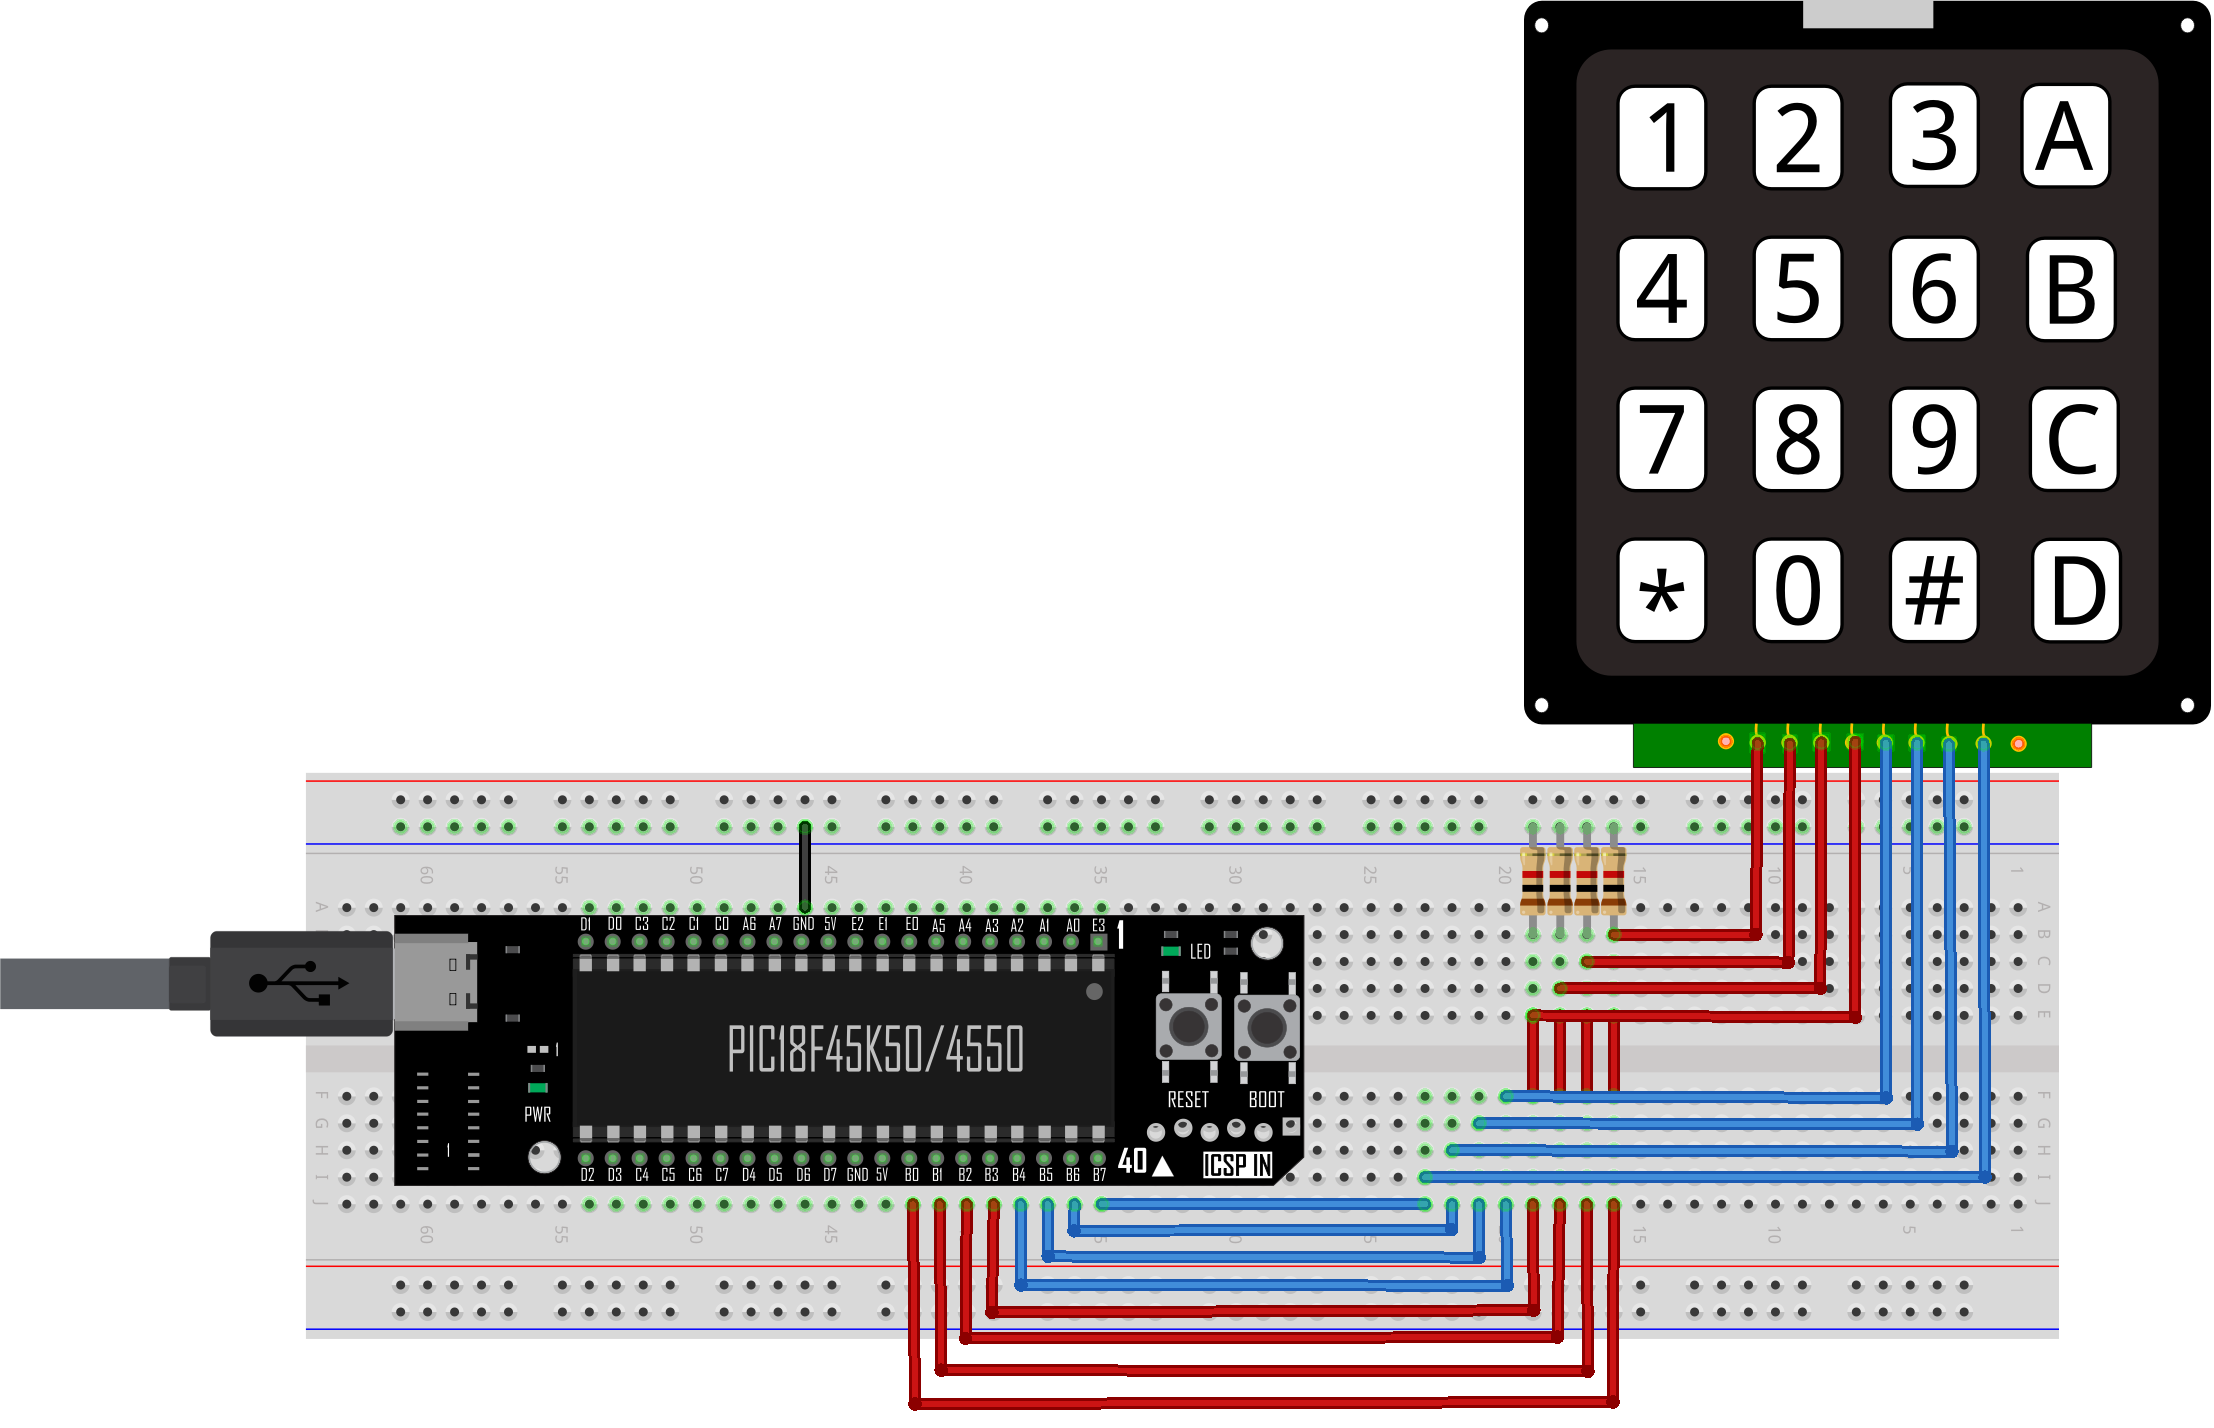
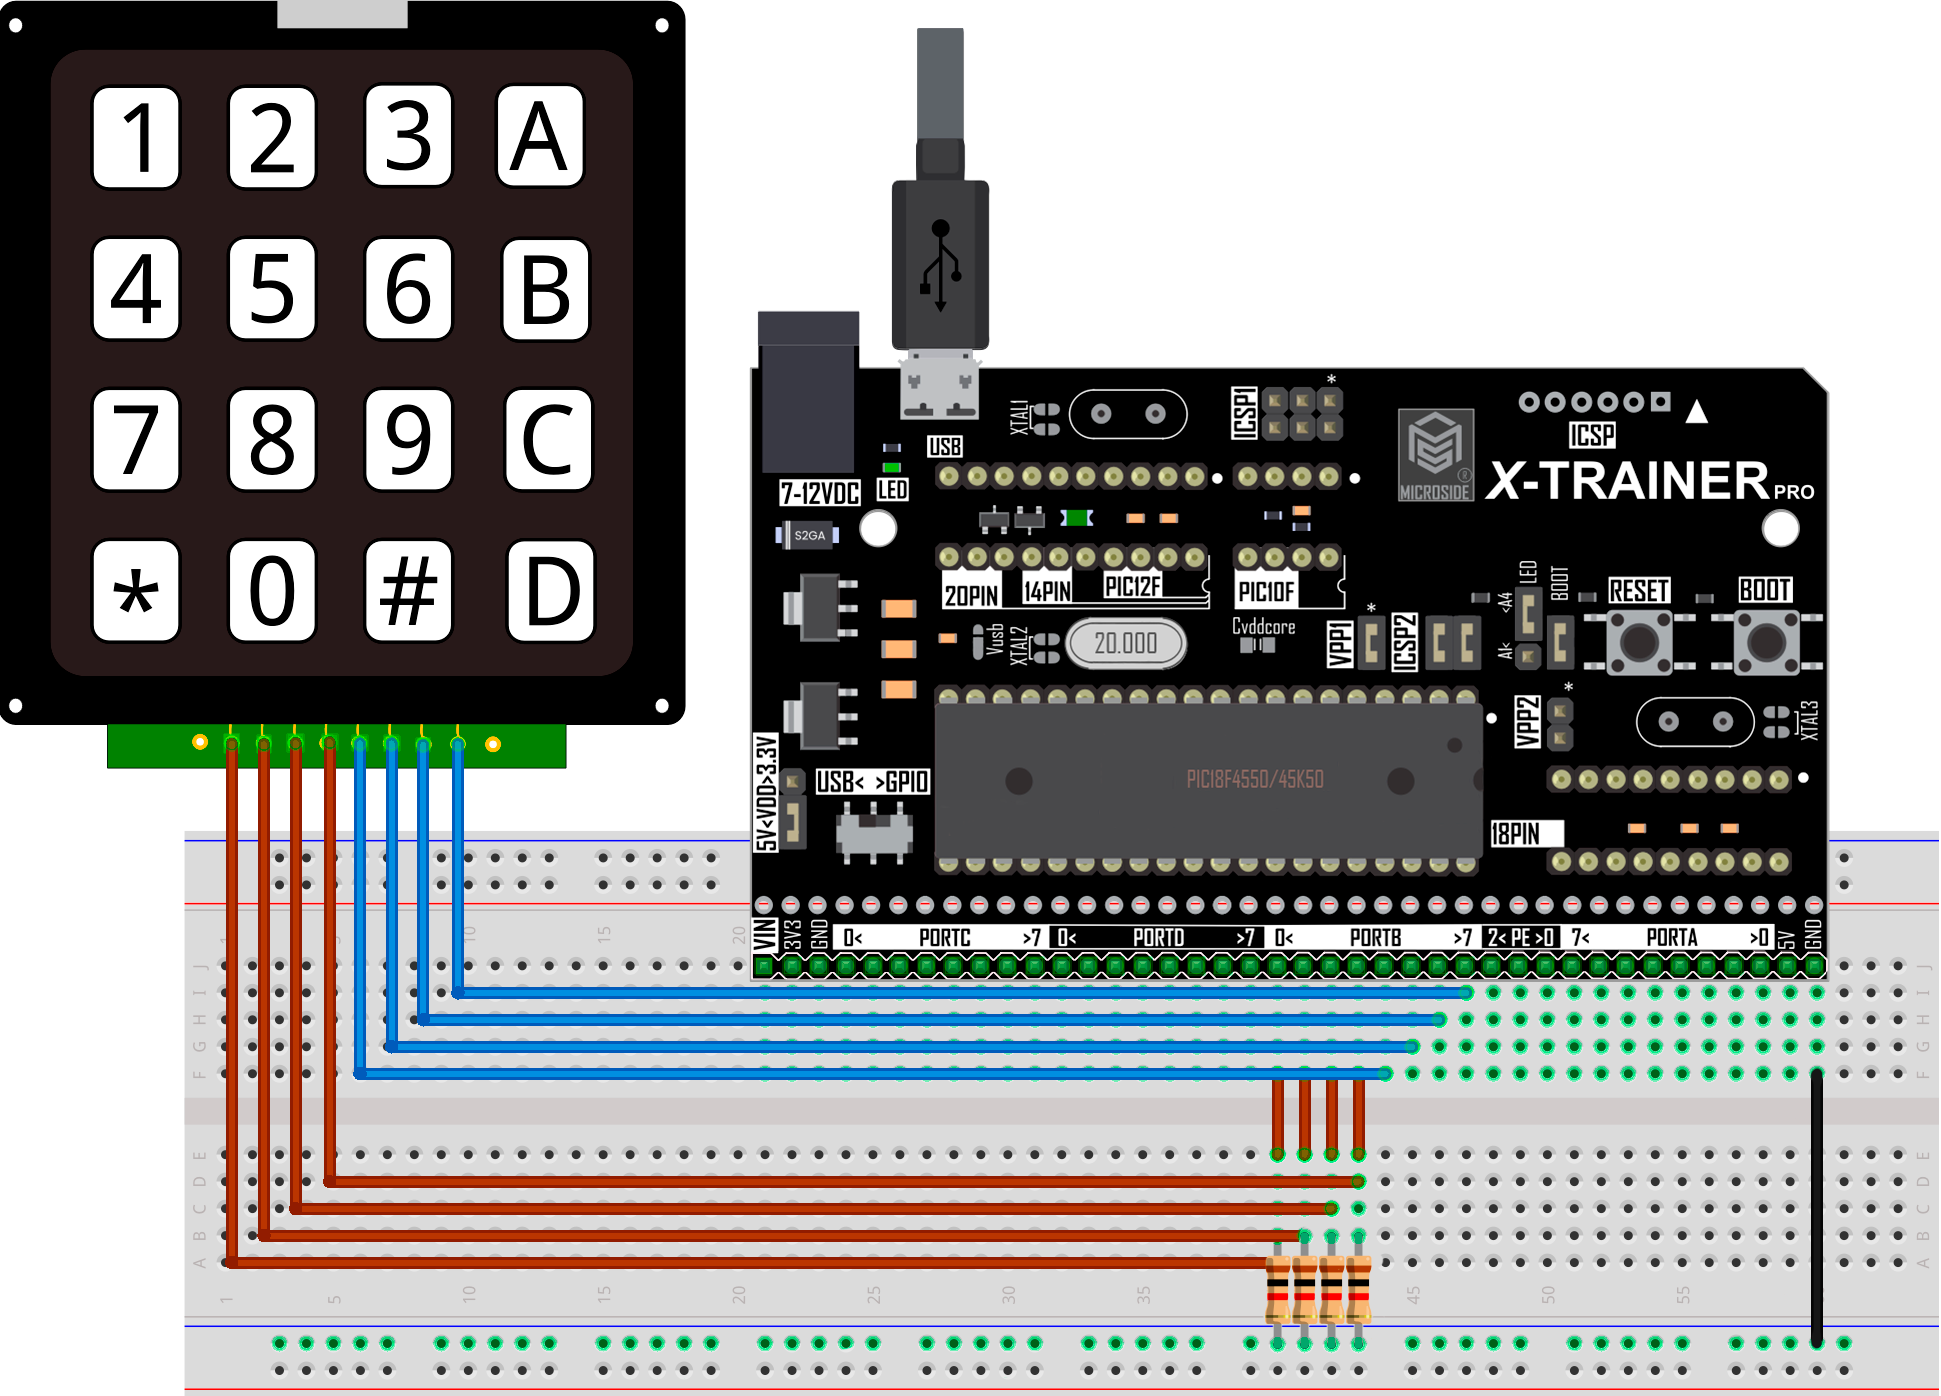
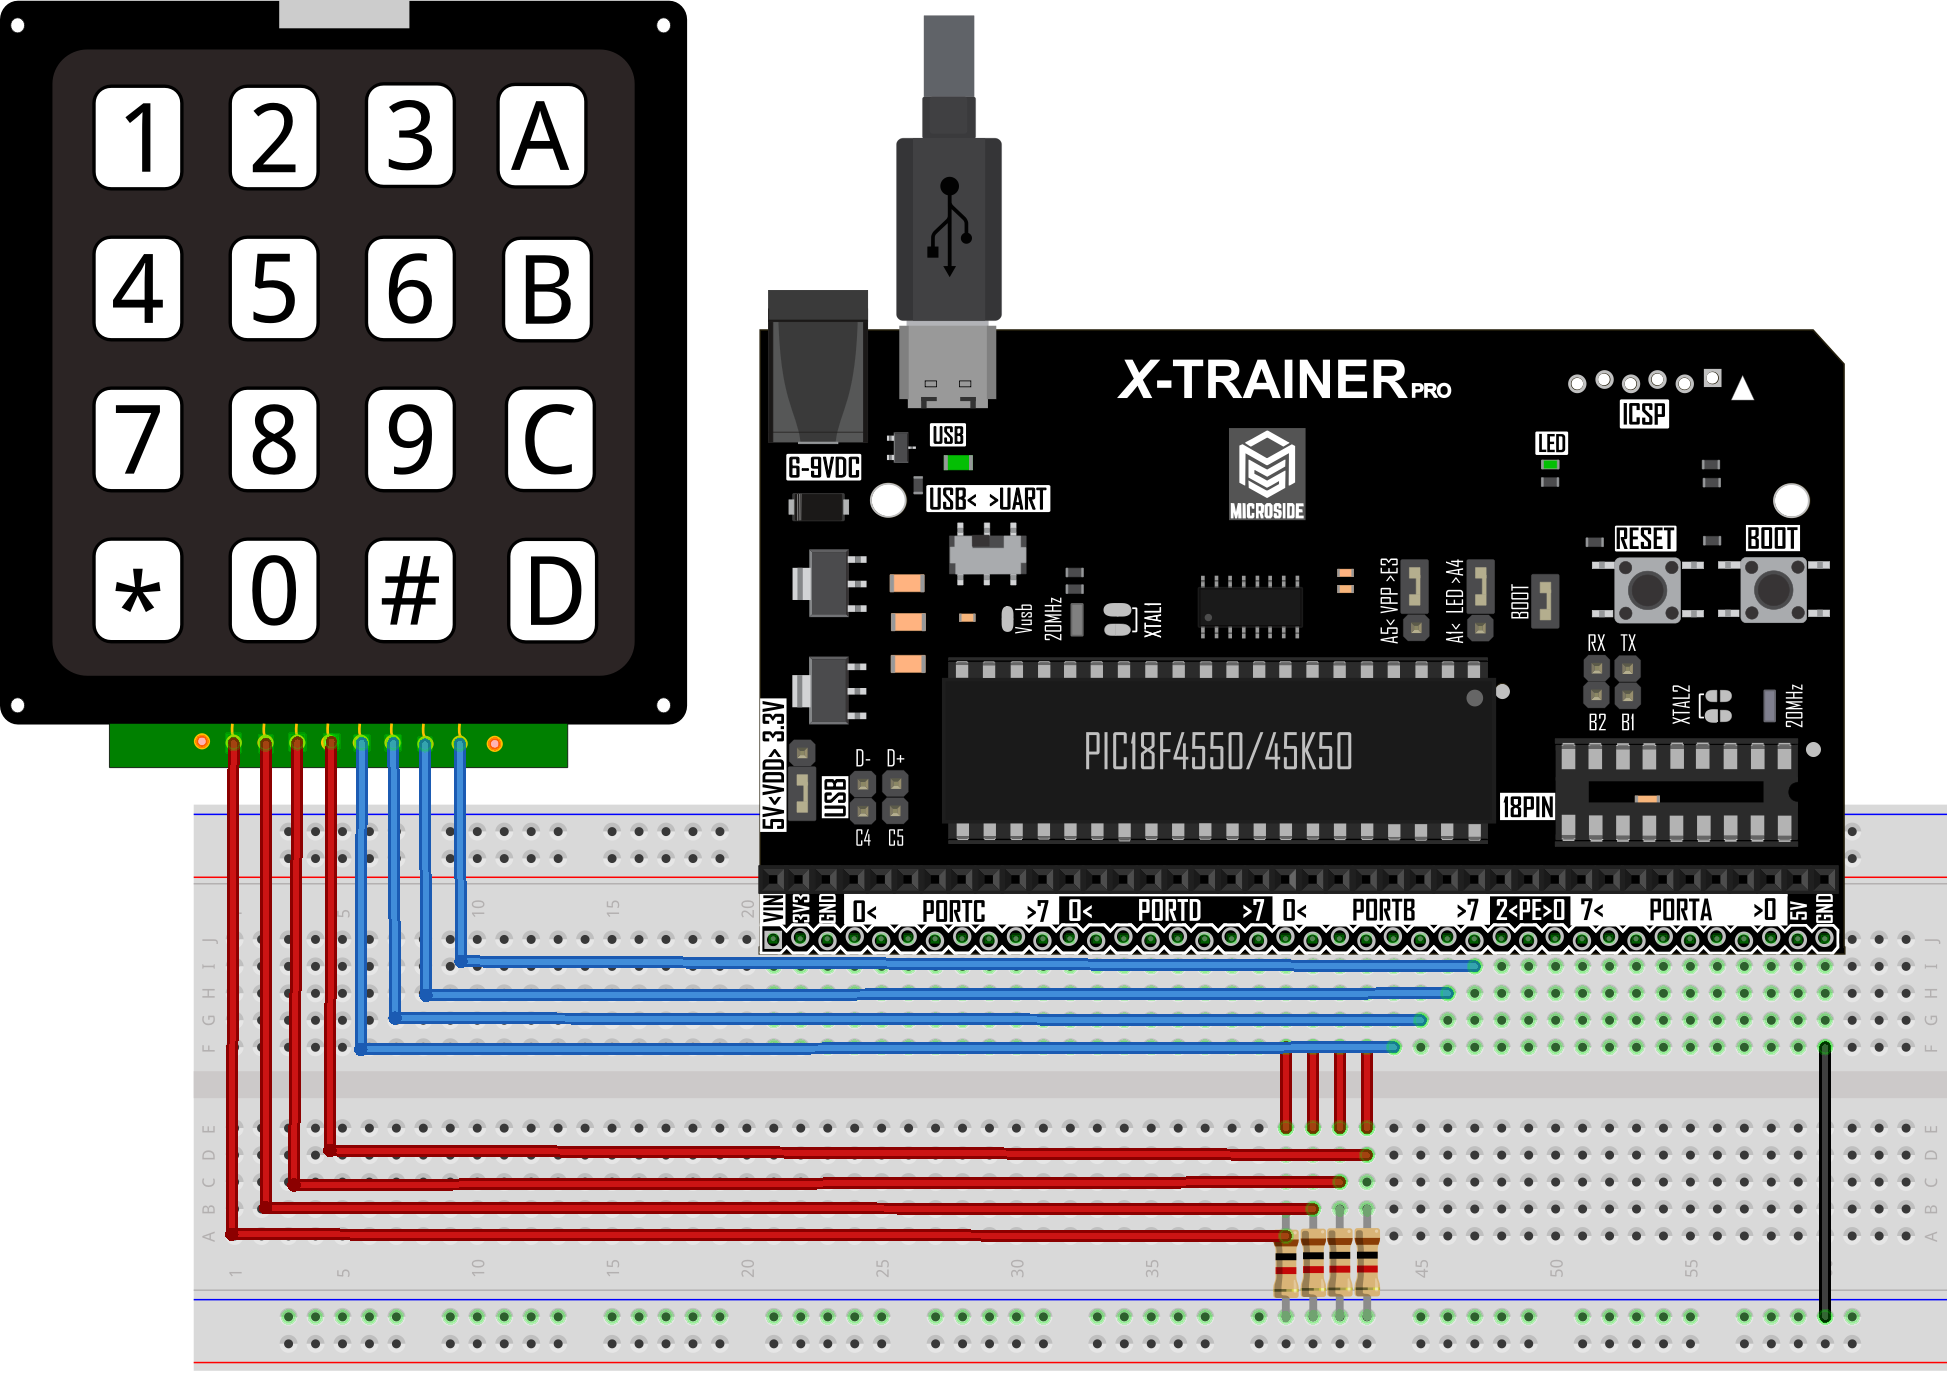
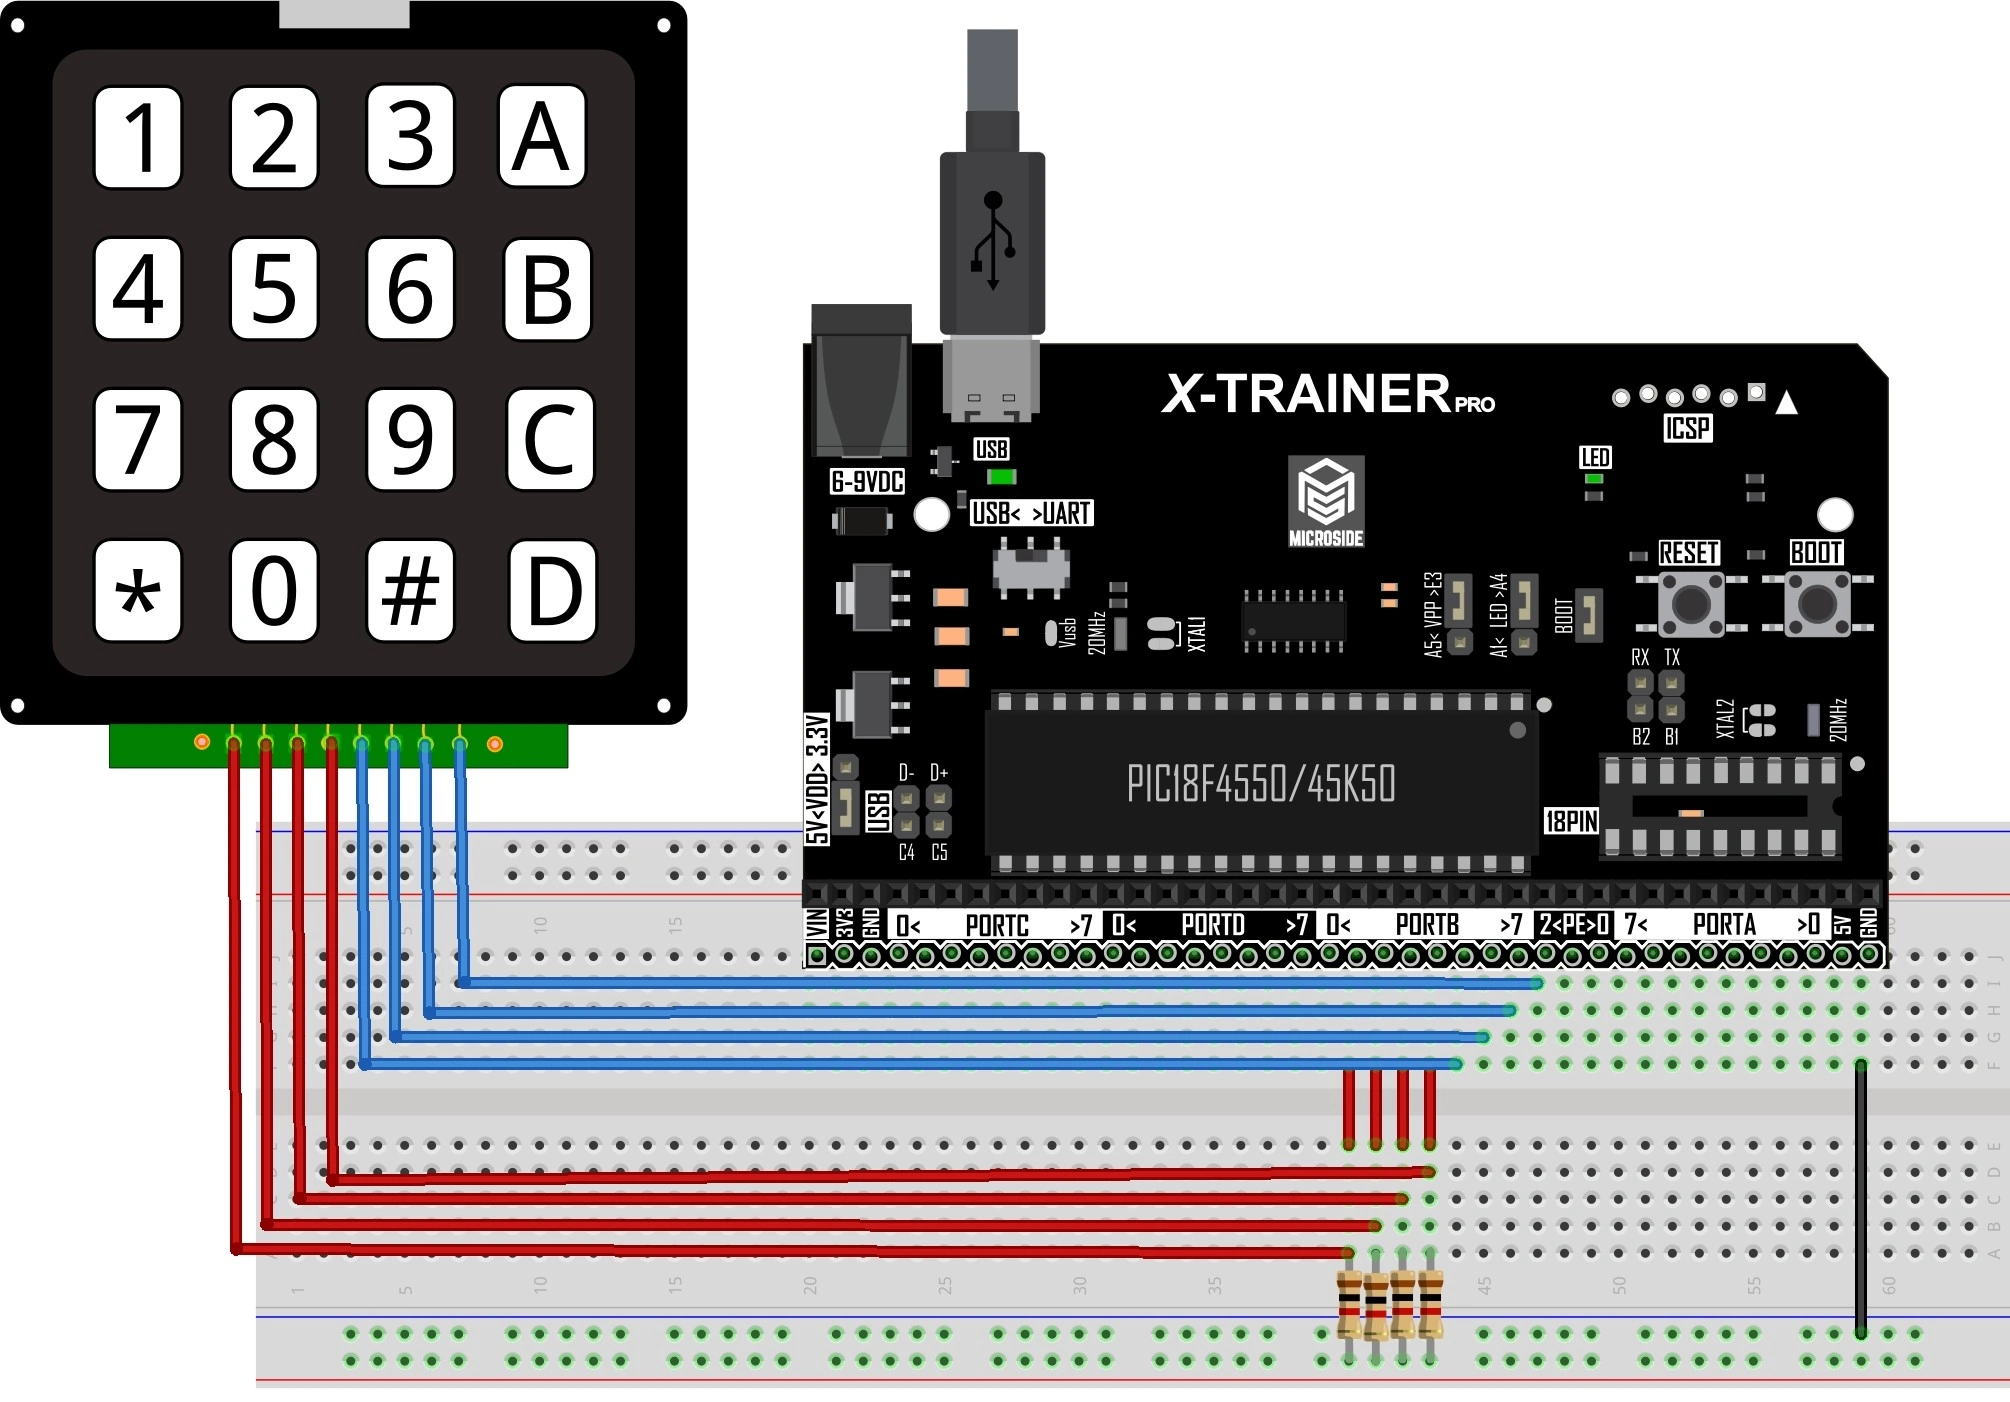
En esta práctica se realiza el control de encendido y apagado del LED incluido en la tarjeta **X-TRAINER** con el **PIC18F4550/PIC18F45K50**. También se utiliza un teclado matricial de 4×4, el cual está conectado en el puerto B con 4 resistencias configuradas como pull-down (B0-B3). Para encender el LED se presiona la tecla 1 y para apagar el LED se presiona la tecla 0.
**Materiales:**
1 x Tarjeta **X-TRAINER**. [**Manuales**](https://docs.microside.com/tarjetas-de-desarrollo/x-trainer) | [**Comprar**](https://www.microside.com/shop/category/entrenadores-pic-1)
1 x Teclado matricial 4×4.
4 x Resistencias 1 kOhms.
1 x Protoboard de 830 puntos.
1 x Juego de cables Dupont.
1 x Cable micro USB.
**Software:**
Windows 7 o posterior.
mikroC PRO Compiler. [**Descarga**](https://www.mikroe.com/mikroc-pic)
X-TRAINER Suite v1.0 [**Descarga**](https://raw.githubusercontent.com/MICROSIDE-TECHNOLOGY/microside_download_archive/main/Tools/X-TRAINER%20Suite/X-TRAINER%20Suite%20Setup.zip)
## **Procedimiento**
**1.** En el apartado de “[**Diagrama Esquemático**](#diagrama-esquematico)” selecciona el modelo de tu tarjeta, realiza las conexiones que se muestran en la imagen y conéctala a la computadora.
{% hint style="info" %}
Las conexiones mostradas en los diagramas esquemáticos son las mismas ya sea que la tarjeta **X-TRAINER** posea el **PIC18F4550** o el **PIC18F45K50**.
{% endhint %}
**2.** Ejecuta **mikroC PRO compiler**, crea un nuevo proyecto con el código fuente que se encuentra en el apartado "[**Código**](#codigo)" y compila el programa.
{% hint style="success" %}
Si tienes dudas de cómo realizar los pasos anteriores puedes encontrar un manual de **mikroC PRO compiler** a través del siguiente[ ](https://docs.microside.com/manuales-de-usuario/ides/pic-c-compiler-ccs)[**link**](https://docs.microside.com/practicas/ides/mikroc-pro-for-pic).
{% endhint %}
**3.** Abre el **Software X-TRAINER Suite v1.0** en el apartado **PIC18F4550/45K50**, selecciona el archivo .hex generado al compilar el proyecto y programa la tarjeta.
{% hint style="success" %}
Si tienes dudas de cómo realizar los pasos anteriores puedes encontrar un manual del **Software X-TRAINER Suite v1.0**. a través del siguiente[ **link**](https://docs.microside.com/tarjetas-de-desarrollo/software-x-trainer-suite).
{% endhint %}
**4.** Al terminar de programar, la tarjeta **X-TRAINER** se reiniciará automáticamente y se ejecutará el programa de esta práctica.
## **Diagrama esquemático**
Selecciona el modelo de tu tarjeta **X-TRAINER.**
{% tabs %}
{% tab title="LITE M R2" %}
{% endtab %}
{% tab title="LITE M R3" %}
{% endtab %}
{% tab title="LITE F" %}
{% endtab %}
{% tab title="DIP" %}
{% endtab %}
{% tab title="DIP R3" %}
{% endtab %}
{% tab title="PRO R2" %}
{% endtab %}
{% tab title="PRO R3" %}
{% endtab %}
{% tab title="PRO R4" %}
{% endtab %}
{% endtabs %}
## **Código**
{% tabs %}
{% tab title="PIC18F4550" %}
{% embed url="" %}
{% endtab %}
{% tab title="PIC18F45K50" %}
{% embed url="" %}
{% endtab %}
{% endtabs %}
## **Descargas**